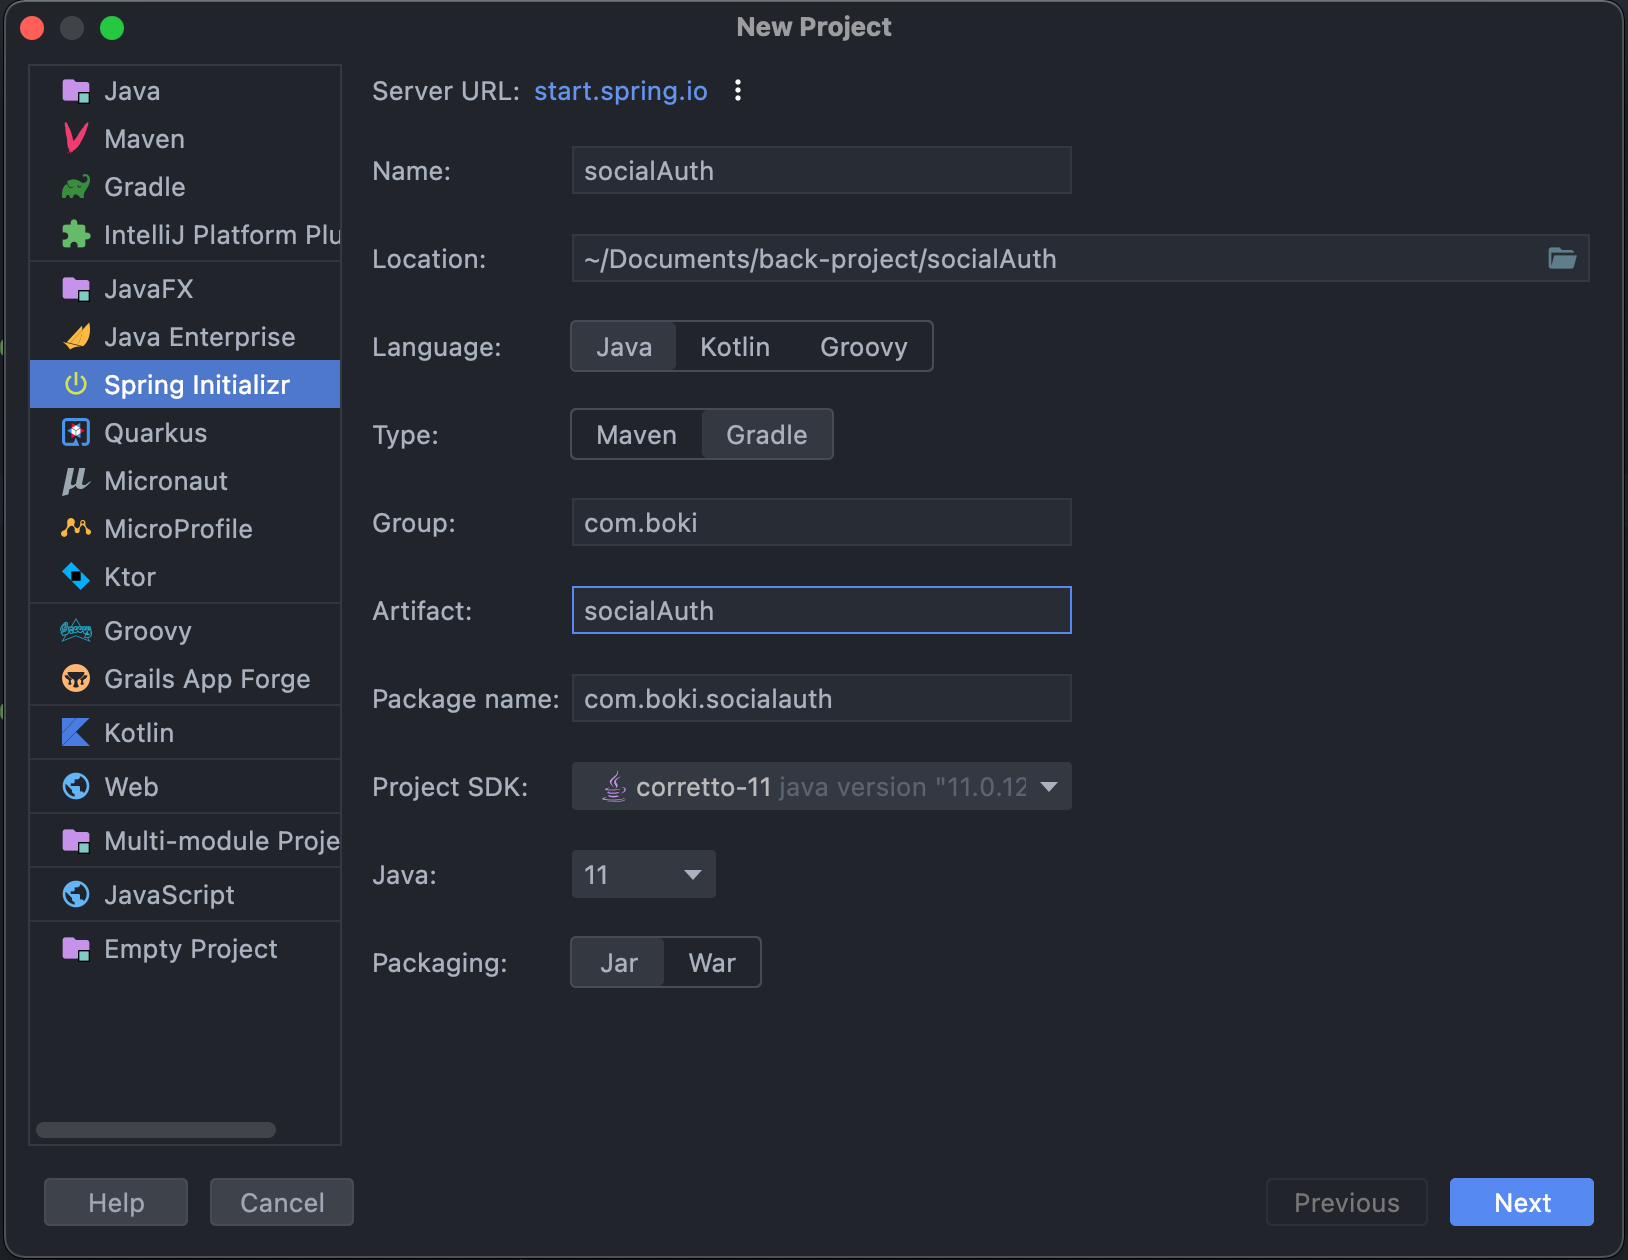
일단 New Project에서 Spring Initializer로 시작하겠다
대충 Gradle로 만들고
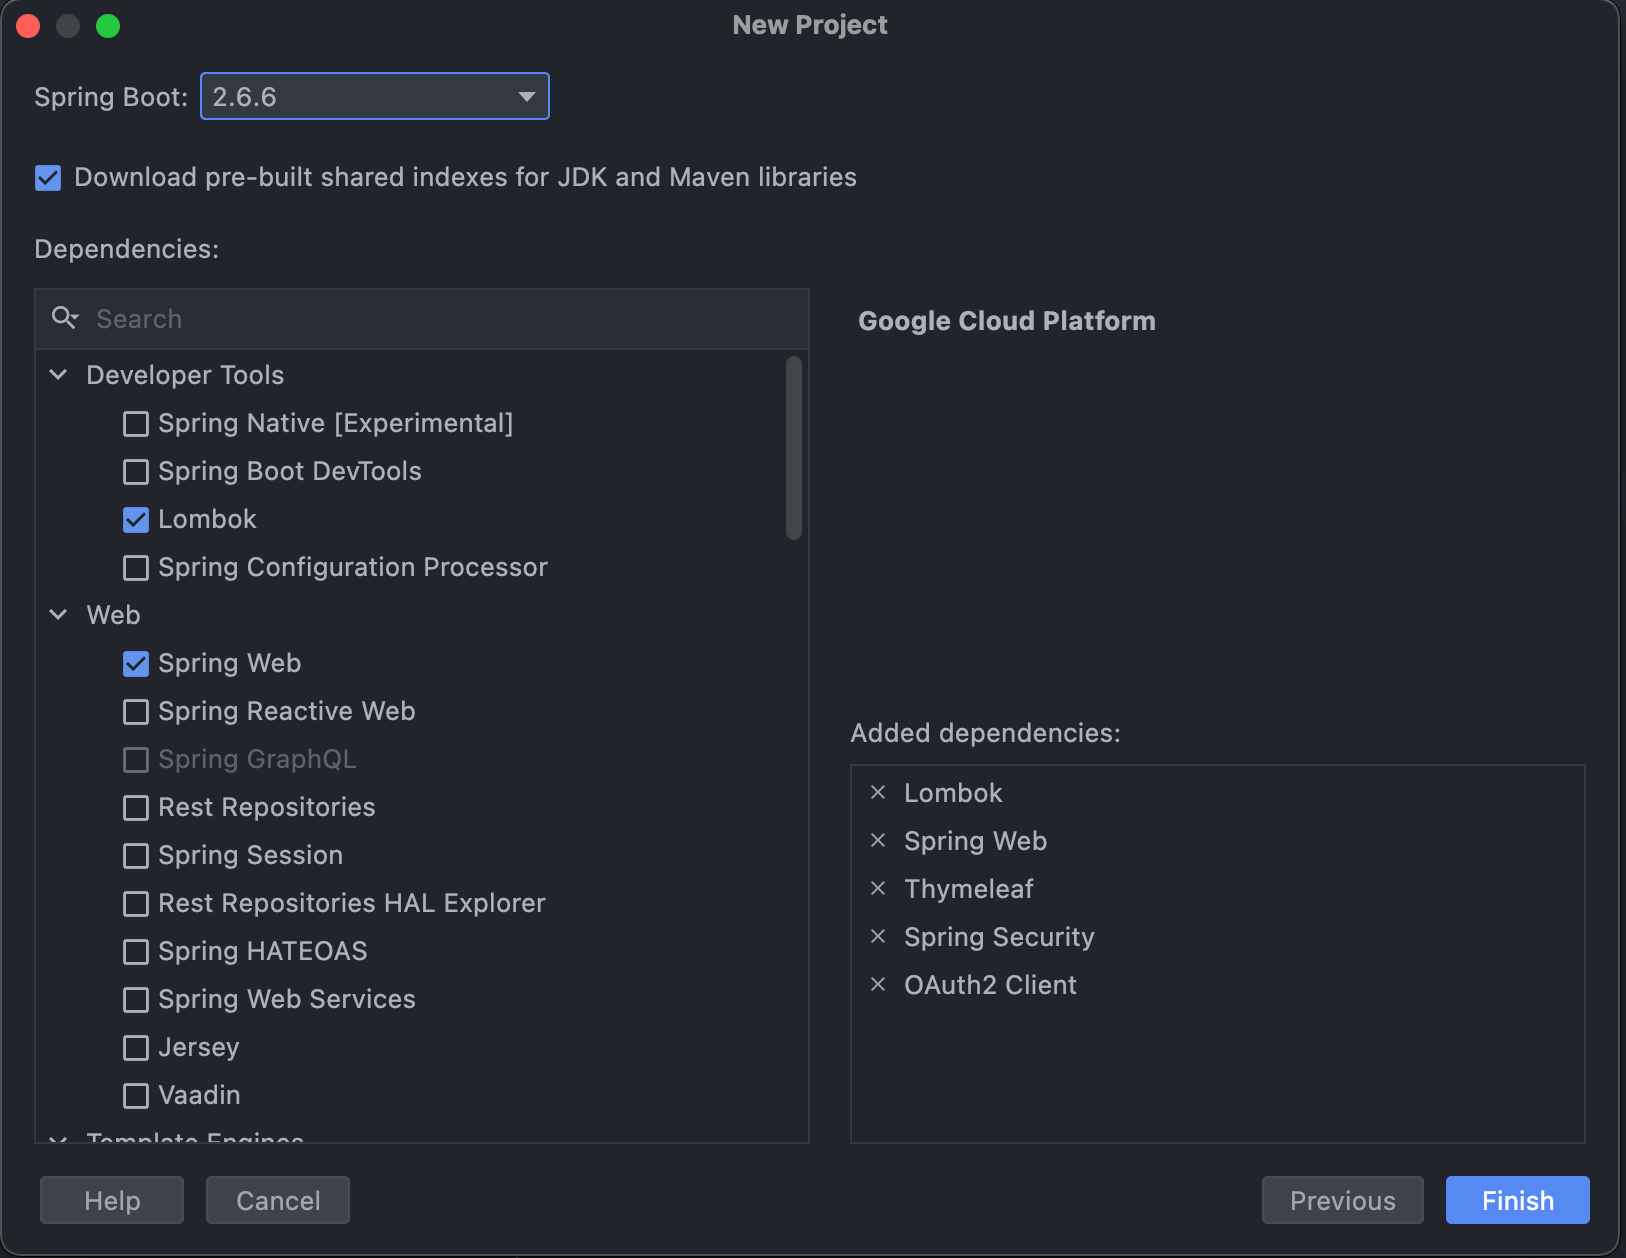
DB는 일단 나중에 붙여도 되므로 Lombok, Spring Web, Thymleaf, Spring Security, OAuth2 Client를 선택해주고 Finish를 눌러준다
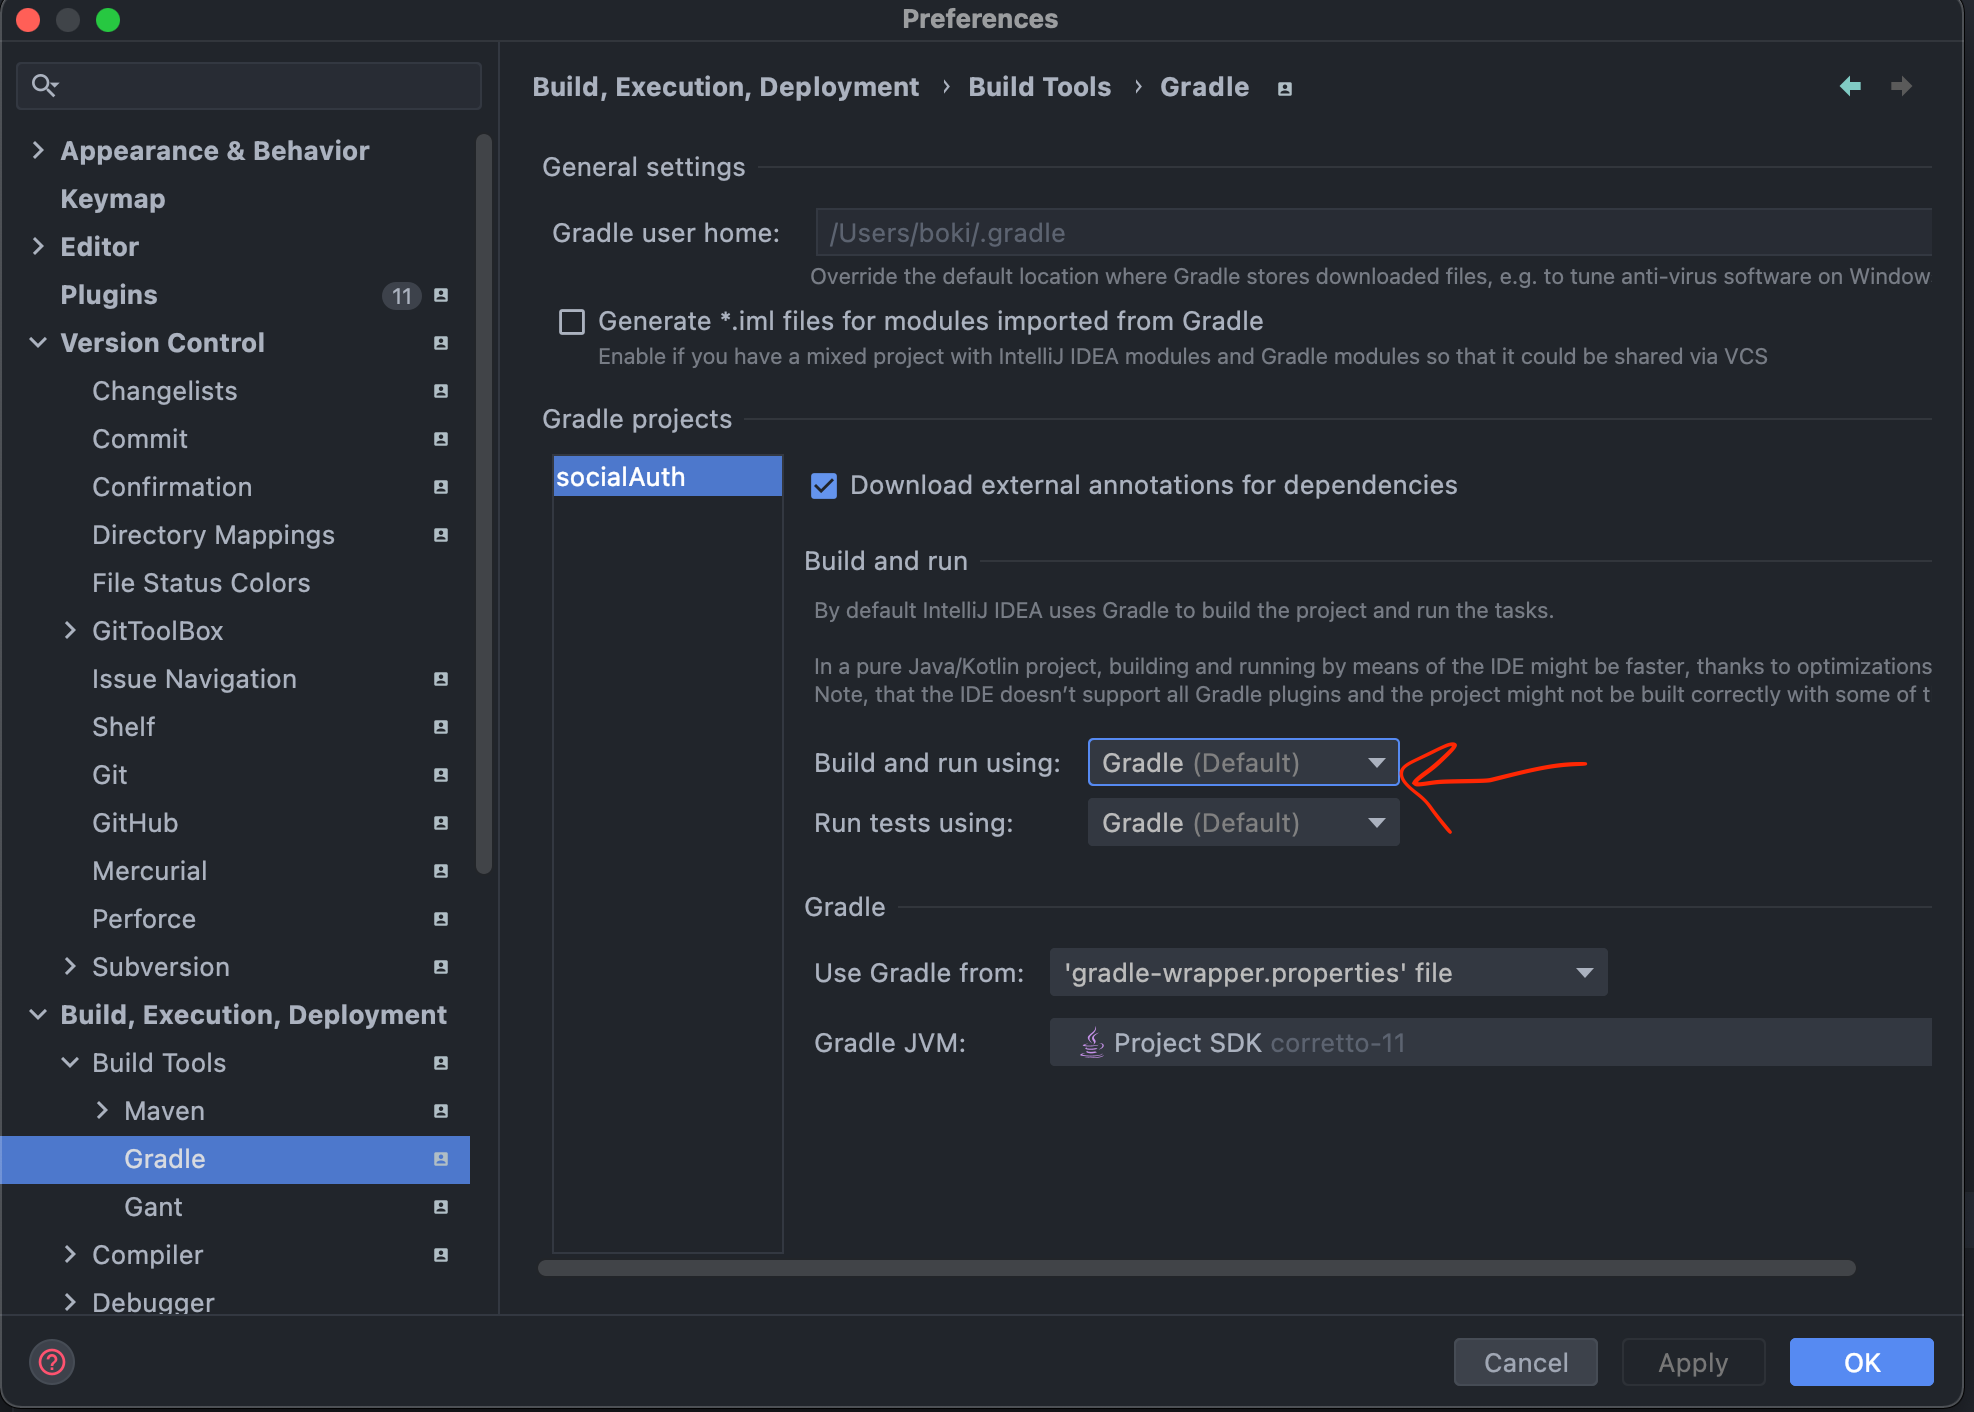
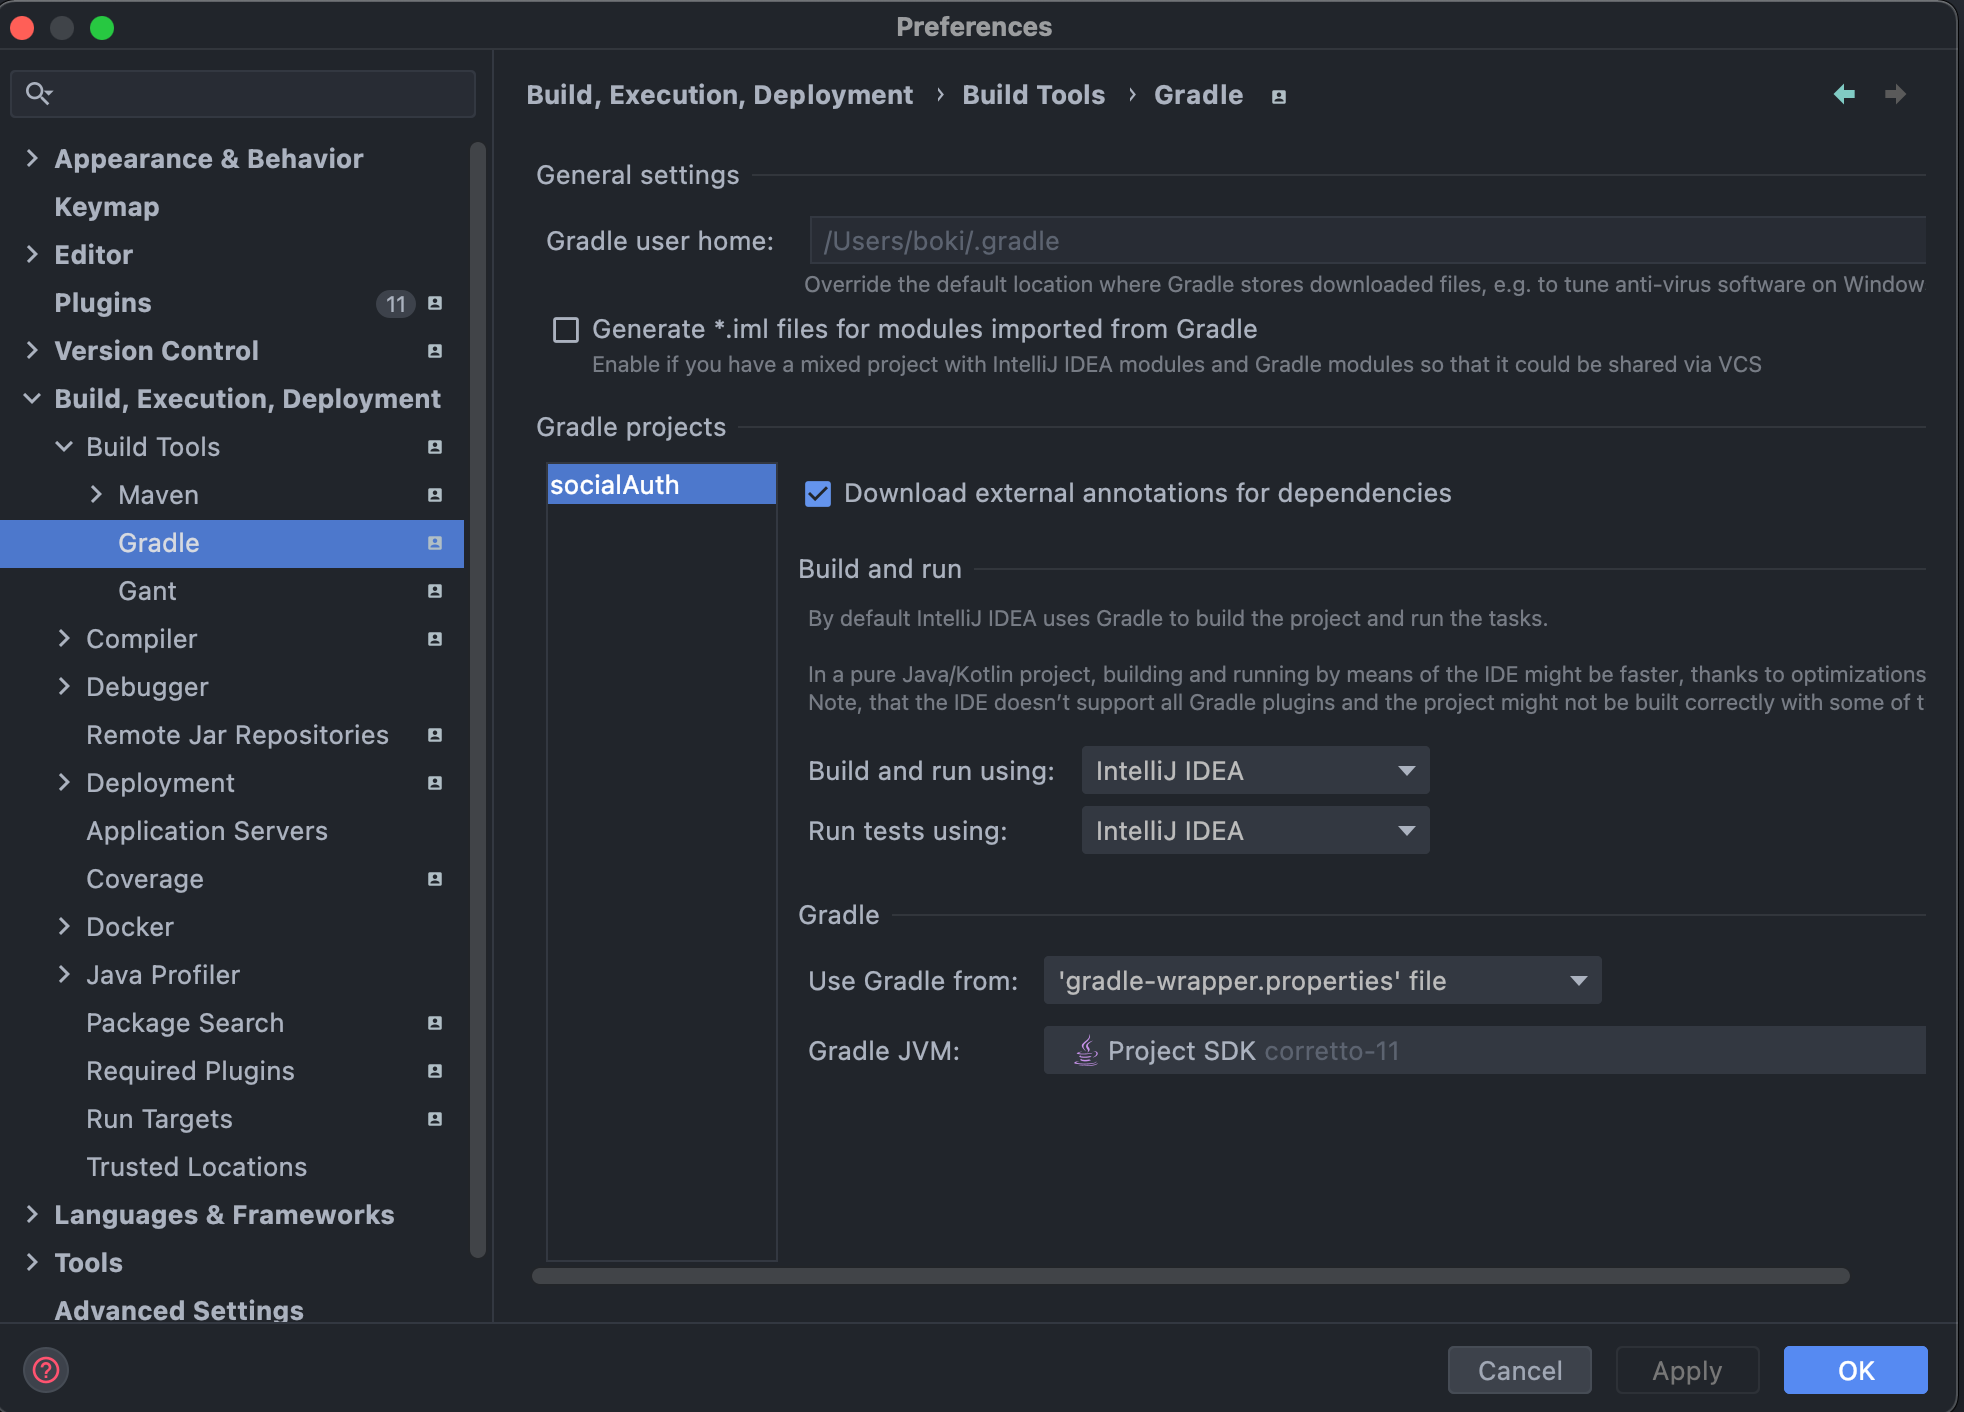
File에 Preferences를 선택해서 Build - Build Tools - Gradle에서 저기 두 부분을 IntelliJ IDEA로 변경해준다
캐싱하고 뭐시기 등등 느리다고 알려져서 인텔리제이로 바꾸는게 빠르다고 한다
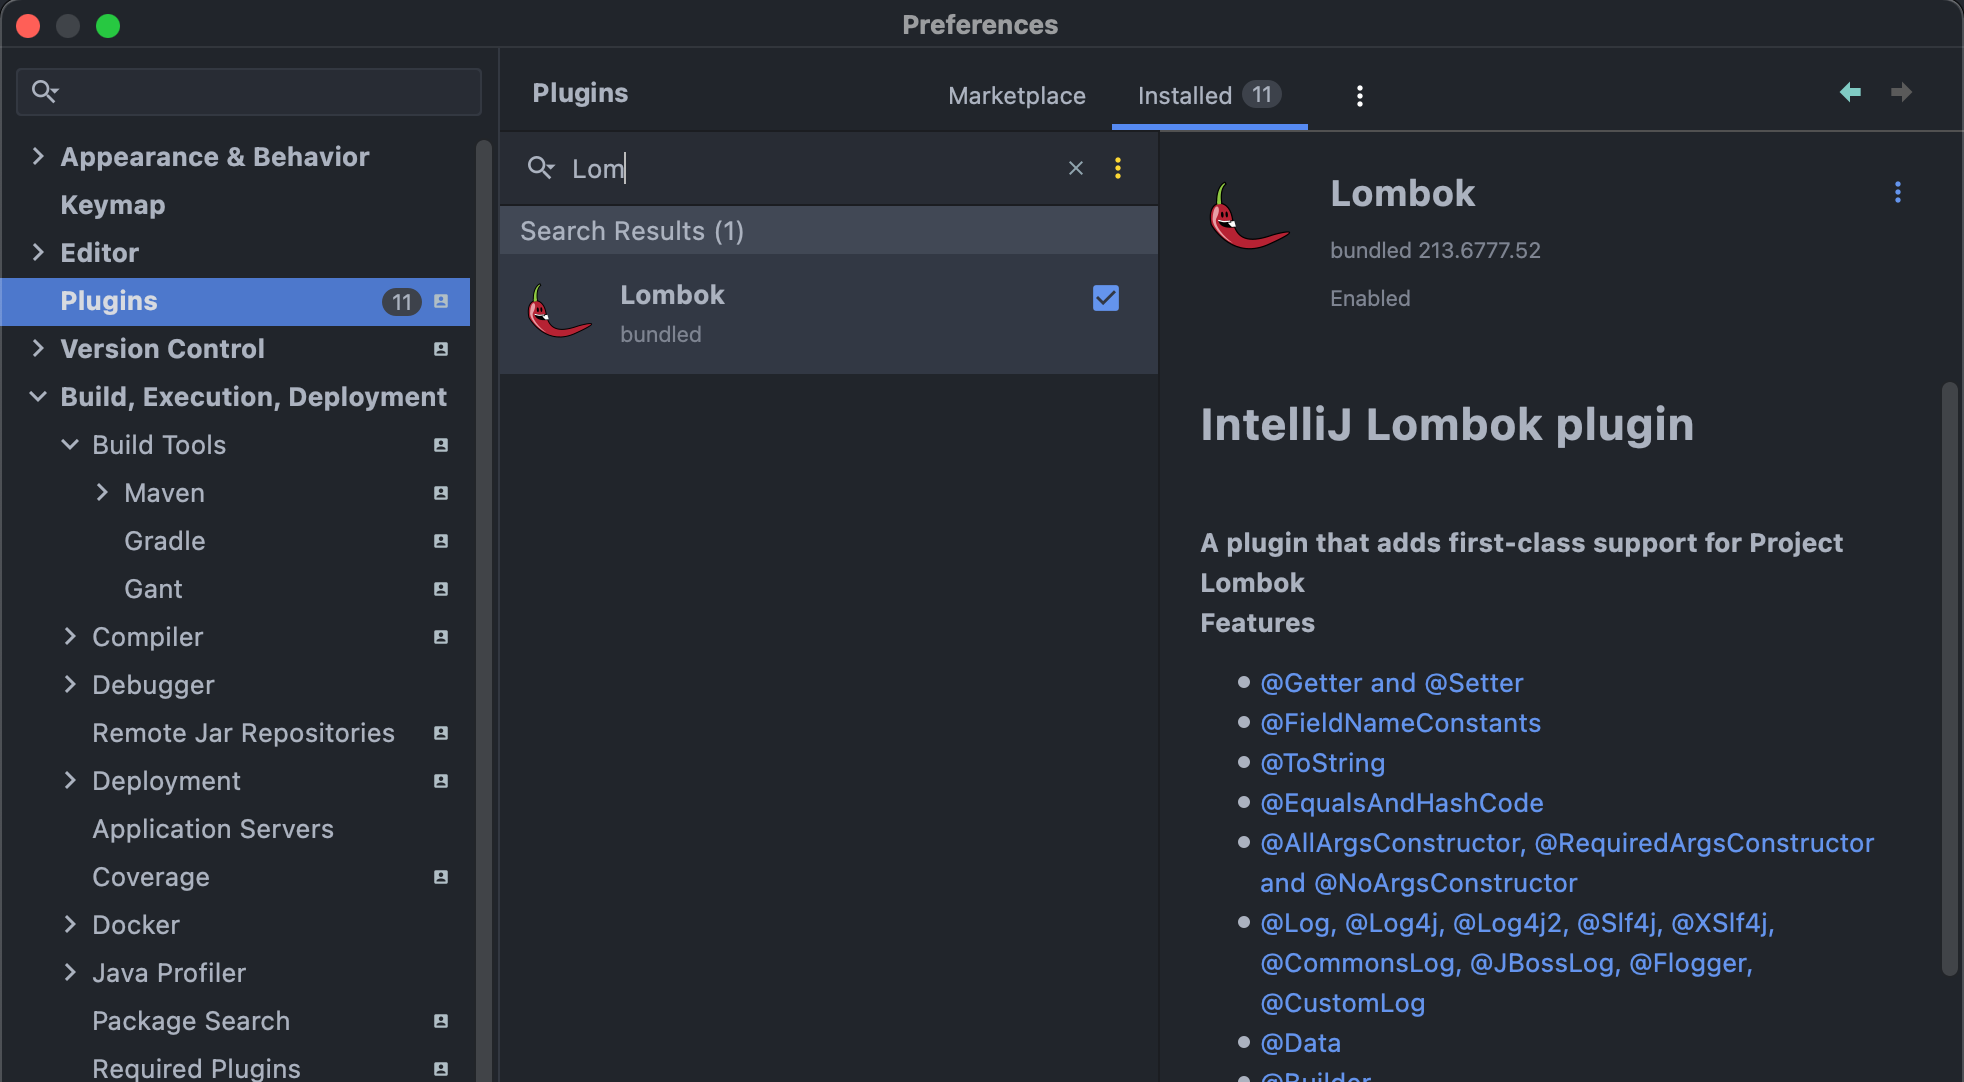
또한 롬복 플러그인을 설치 안하신분이 있다면 설치를 하자
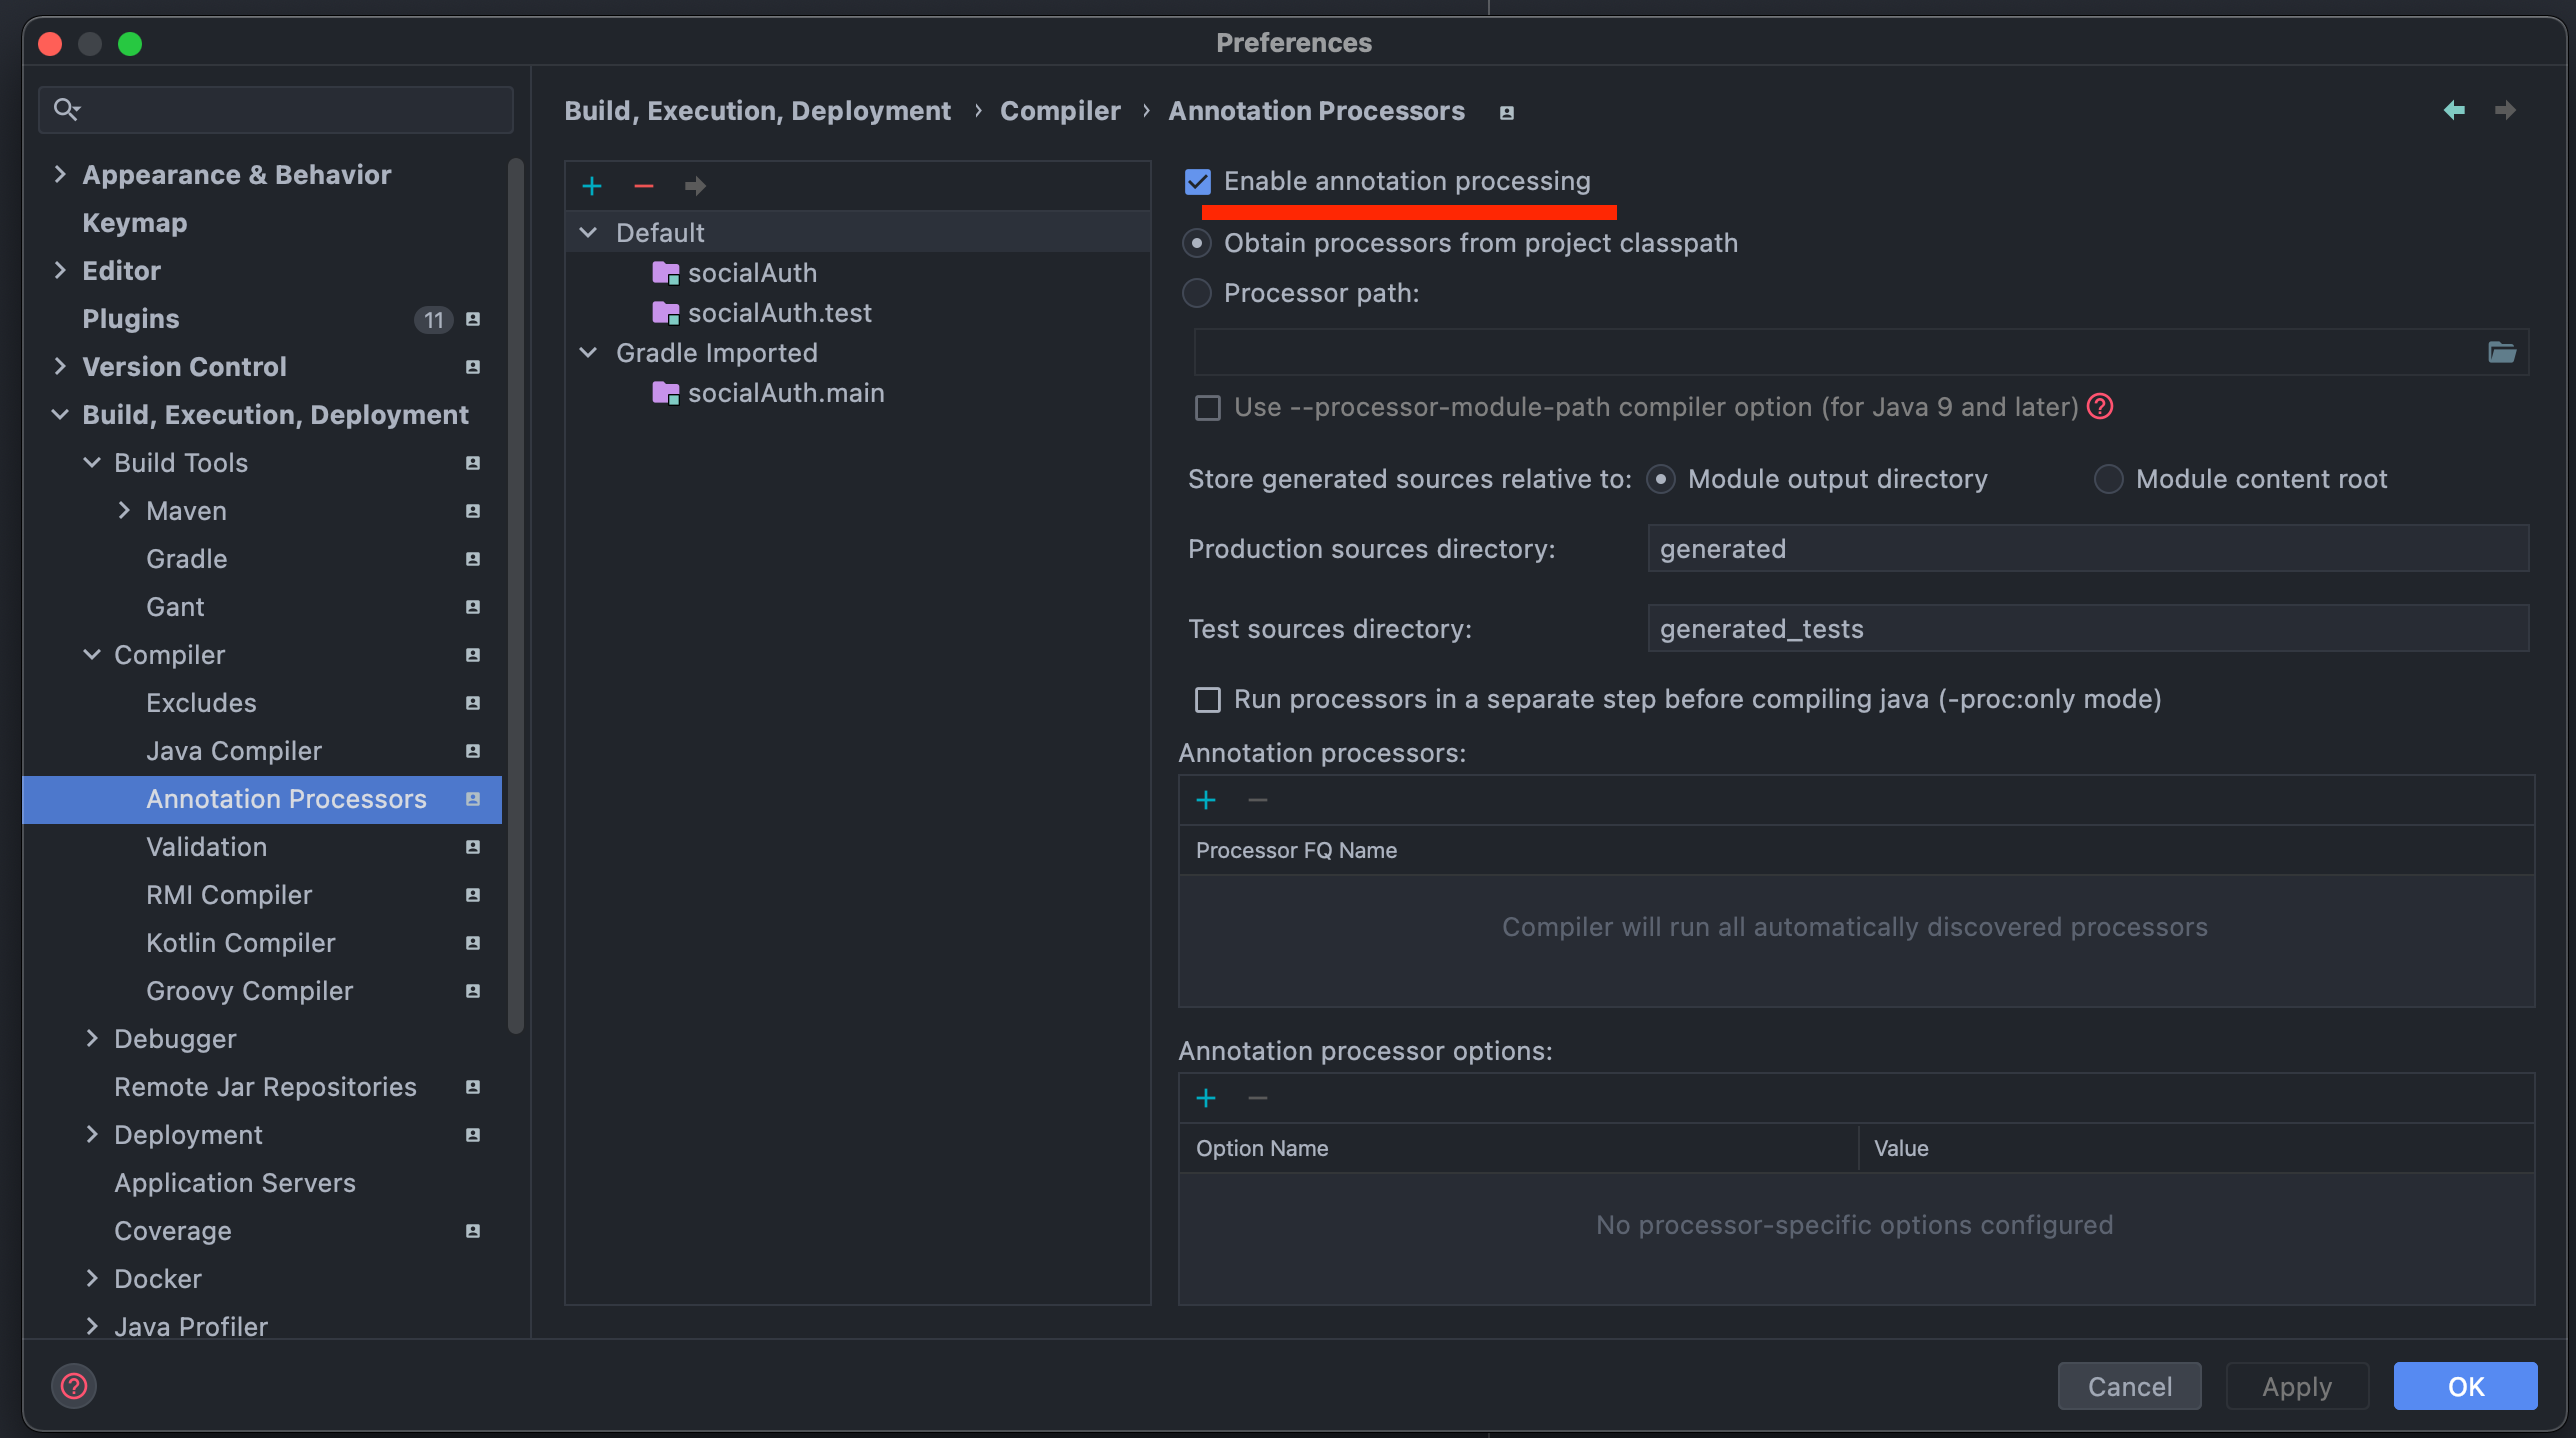
추가로 어노테이션 처리 활성화도 해준다
File - Preferences - Compiler - Annotation Processors
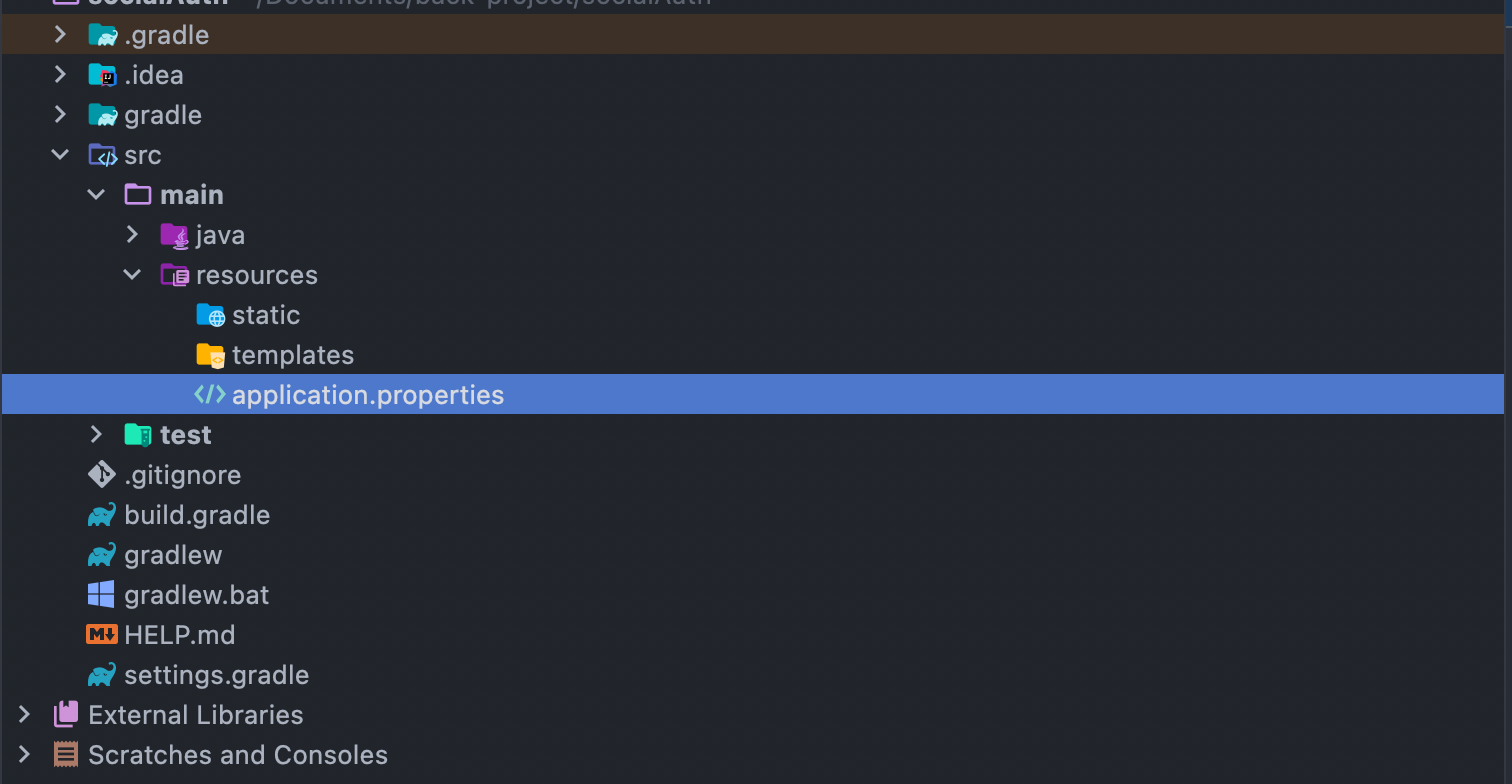
application.properites 파일 확장자를 .yml로 바꿔준다
그리고 1편에서 발급받은 client_id, client_secret으로 채워준다
참고로 나는 port를 80으로 바꿔줬다
server:
  port: 80

spring:
  security:
    oauth2:
      client:
        provider:
          naver:
            authorizationUri: https://nid.naver.com/oauth2.0/authorize
            tokenUri: https://nid.naver.com/oauth2.0/token
            userInfoUri: https://openapi.naver.com/v1/nid/me
            userNameAttribute: response
          kakao:
            authorizationUri: https://kauth.kakao.com/oauth/authorize
            tokenUri: https://kauth.kakao.com/oauth/token
            userInfoUri: https://kapi.kakao.com/v2/user/me
            userNameAttribute: id
        registration:
          google:
            client-id: [ 😜 클라이언트 키 값 ]
            client-secret: [ 😛 클라이언트 시크릿 값 ]
            scope: profile, email
          facebook:
            client-id: [ 😜 클라이언트 키 값 ]
            client-secret: [ 😛 클라이언트 시크릿 값 ]
            scope: email, public_profile
          kakao:
            client-id: [ 😜 클라이언트 키 값 ]
            client-secret: [ 😛 클라이언트 시크릿 값 ]
            client-authentication-method: POST
            authorizationGrantType: authorization_code
            redirectUri: "{baseUrl}/{action}/oauth2/code/{registrationId}"
            scope: profile_nickname, profile_image, account_email
            client-name: Kakao
          naver:
            client-id: [ 😜 클라이언트 키 값 ]
            client-secret: [ 😛 클라이언트 시크릿 값 ]
            authorizationGrantType: authorization_code
            redirectUri: "{baseUrl}/{action}/oauth2/code/{registrationId}"
            scope: name, nickname, email, profile_image
            client-name: Naver
          github:
            clientId: [ 😜 클라이언트 키 값 ]
            clientSecret: [ 😛 클라이언트 시크릿 값 ]
참고로 구글과 페이스북은 공식 대빵이라서 provider 정보를 알고있다. (인증서버, 토큰서버, 유저정보서버, PK값 등등)
하지만 국내 서비스인 네이버, 카카오는 전세계 공용이 아니기때문에 provider 정보를 알려줘야 한다!!
프로젝트의 구조는 이렇게 된다
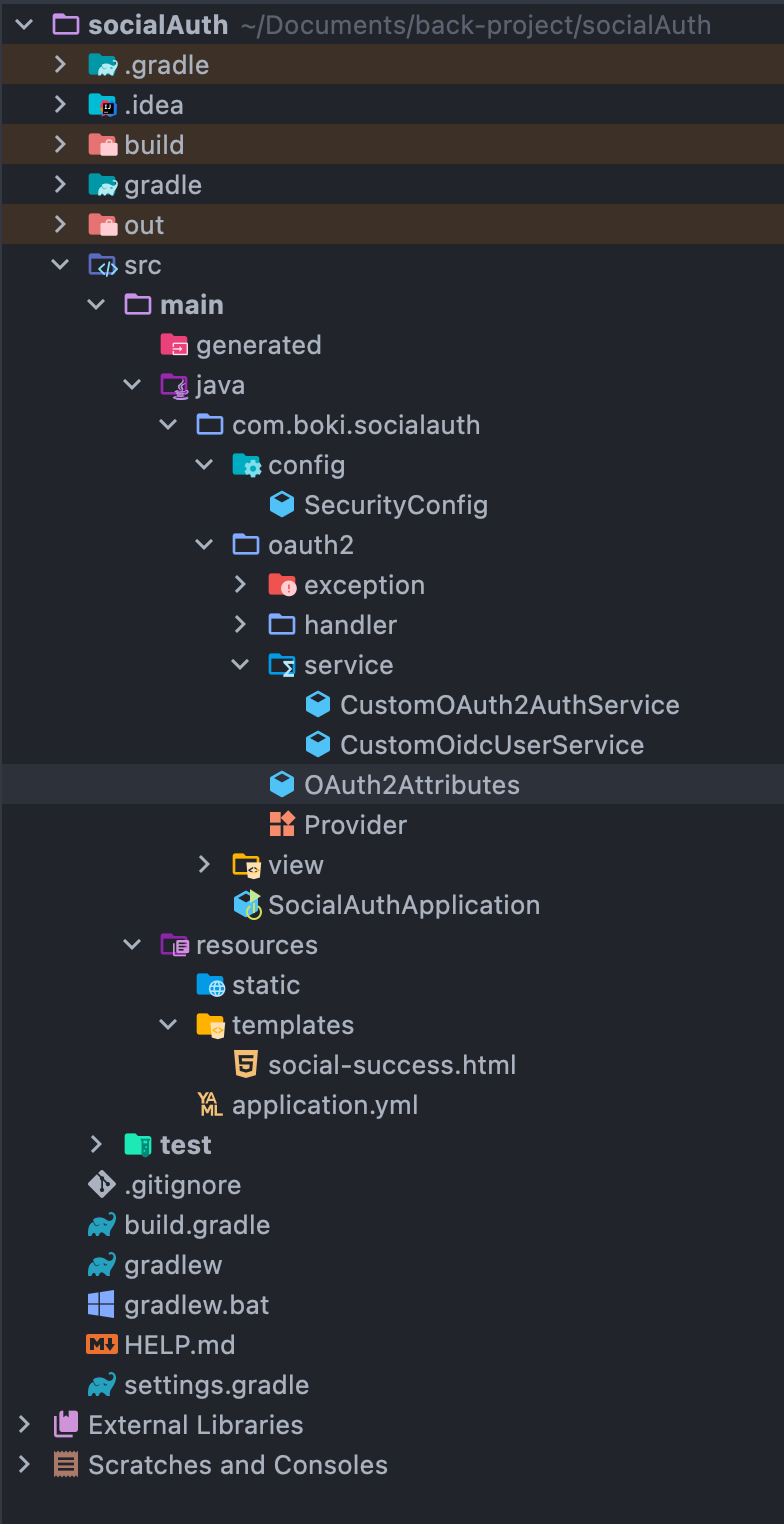
먼저 resources - templates 밑에서 social-success.html을 만들자
<!DOCTYPE html>
<html xmlns:th="http://www.thymeleaf.org" lang="ko">
<head>
  <meta charset="UTF-8">
  <title>Social Login Success</title>
</head>
<body>
  <h1>소셜 로그인 성공</h1>
  <h2 th:text="${provider}"> 앱 </h2>
  <h2 th:text="${oauthId}"> 아이디 </h2>
</body>
</html>
html 쪽에 타임리프 엔진을 쓰겠다고 명시를 하고, 값은 th: - 로 가져왔다
타임리프 시간이 아니기때문에 패스를 하겠다 참고로 스프링은 공식적으로 SSR은 JSP보다는 타임리프를 밀고있는거같다
궁금하면 공식문서를 보고 배우자. SSR의 종류에는 JSP, velocity, thymleaf, mustache 등등이 있다..
이번에는 이 성공화면을 보여줄 ViewController를 만들자
난 나중에 Rest방식의 컨트롤러와 구분하기 위해서 view 패키지를 만들었다
package com.boki.socialauth.view;

import org.springframework.stereotype.Controller;
import org.springframework.ui.Model;
import org.springframework.web.bind.annotation.GetMapping;
import org.springframework.web.bind.annotation.RequestParam;

@Controller
public class ViewController {

    @GetMapping("/social")
    public String socialSuccess(Model model,
        @RequestParam(value = "provider", required = false) String provider,
        @RequestParam(value = "oauthId", required = false) String oauthId
    ) {
        model.addAttribute("provider", provider);
        model.addAttribute("oauthId", oauthId);
        return "social-success";
    }
}
로직은 딱히 없다. Model객체에 provider와 oauthId를 담아서 던져주는데, Param들은 필수값이 아니다
반환하는것은 social-success.html이다
타임리프 엔진을 이용하므로 서버에서 던진 데이터가 내부적으로 받아오는 변수하고 매핑이 되어진다
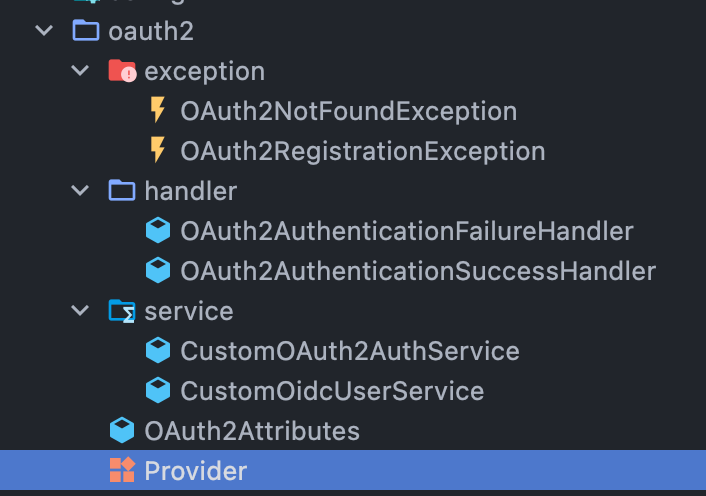
package com.boki.socialauth.oauth2;

public enum Provider {
    LOCAL, GOOGLE, NAVER, KAKAO, FACEBOOK, GITHUB
}
이번에는 oauth2 패키지 밑의 Provider enum을 적어준다. Enum도 자바8 lambda를 이용해서 우아하게 처리할수도 있던데 그건 나중에 포스팅하겠다
// 자원 없음
package com.boki.socialauth.oauth2.exception;

public class OAuth2NotFoundException extends RuntimeException {
    public OAuth2NotFoundException(String message) {
        super(message);
    }
}
// 가입 실패
package com.boki.socialauth.oauth2.exception;

public class OAuth2RegistrationException extends RuntimeException {
    public OAuth2RegistrationException(String message) {
        super(message);
    }
}
원래는 이렇게 바로 런타임예외를 던지면 안된다. 나는 프로젝트를 새로 파서 아직 Advice 전역 예외 처리 컨트롤러가 없다
나중에 만들면 OAuth2NotFoundException은 NotFoundException 혹은 ResourceNotFoundException를 구현해야 하고, OAuth2RegistrationException은 BadRequestException을 구현하면 될 것이다
그럼 이제 각각 소셜 로그인 정보들이 담길 OAuth2Attributes 클래스를 만들자
package com.boki.socialauth.oauth2;

import com.boki.socialauth.oauth2.exception.OAuth2RegistrationException;
import com.fasterxml.jackson.core.JsonProcessingException;
import com.fasterxml.jackson.databind.ObjectMapper;
import java.util.Map;
import lombok.Builder;
import lombok.Getter;
import lombok.SneakyThrows;
import lombok.extern.slf4j.Slf4j;
import org.springframework.util.ObjectUtils;

@Slf4j
@Getter
public class OAuth2Attributes {
    private final Map<String, Object> attributes;
    private final String nameAttributeKey;
    private final String oauthId;
    private final String nickname;
    private final String email;
    private final String picture;
    private final Provider provider;

    @Builder
    public OAuth2Attributes(Map<String, Object> attributes, String nameAttributeKey, String oauthId, String nickname, String email, String picture, Provider provider) {
        this.attributes = attributes;
        this.nameAttributeKey = nameAttributeKey;
        this.oauthId = oauthId;
        this.nickname = nickname;
        this.email = email;
        this.picture = picture;
        this.provider = provider;
    }

    @SneakyThrows
    public static OAuth2Attributes of(String registrationId, String userNameAttributeName, Map<String, Object> attributes) {
        log.info("userNameAttributeName = {}", new ObjectMapper().writerWithDefaultPrettyPrinter().writeValueAsString(userNameAttributeName));
        log.info("attributes = {}", new ObjectMapper().writerWithDefaultPrettyPrinter().writeValueAsString(attributes));
        String registrationIdToLower = registrationId.toLowerCase();
        switch (registrationIdToLower) {
            case "naver": return ofNaver(userNameAttributeName, attributes);
            case "kakao": return ofKakao(userNameAttributeName, attributes);
            case "google": return ofGoogle(userNameAttributeName, attributes);
            case "facebook": return ofFacebook(userNameAttributeName, attributes);
            case "github": return ofGithub(userNameAttributeName, attributes);
            default: throw new OAuth2RegistrationException("해당 소셜 로그인은 현재 지원하지 않습니다.");
        }
    }

    @SuppressWarnings("unchecked")
    private static OAuth2Attributes ofNaver(String userNameAttributeName, Map<String, Object> attributes) {
        Map<String, Object> response = (Map<String, Object>) attributes.get("response");
        return OAuth2Attributes.builder()
            .oauthId((String) response.get("id"))
            .nickname((String) response.get("name"))
            .email((String) response.get("email"))
            .picture((String) response.get("profile_image"))
            .provider(Provider.NAVER)
            .attributes(response)
            .nameAttributeKey("id")
            .build();
    }


    @SuppressWarnings("unchecked")
    private static OAuth2Attributes ofKakao(String userNameAttributeName, Map<String, Object> attributes) {
        Map<String, Object> account = (Map<String, Object>) attributes.get("kakao_account");
        Map<String, Object> profile = (Map<String, Object>) account.get("profile");
        return OAuth2Attributes.builder()
            .oauthId(attributes.get(userNameAttributeName).toString())
            .nickname((String) profile.get("nickname"))
            .email((String) account.get("email"))
            .picture((String) profile.get("profile_image_url"))
            .provider(Provider.KAKAO)
            .attributes(attributes)
            .nameAttributeKey(userNameAttributeName)
            .build();
    }

    private static OAuth2Attributes ofFacebook(String userNameAttributeName,
        Map<String, Object> attributes) throws JsonProcessingException {
        return OAuth2Attributes.builder()
            .oauthId((String) attributes.get("id"))
            .nickname((String) attributes.get("name"))
            .email((String) attributes.get("email"))
            .provider(Provider.FACEBOOK)
            .attributes(attributes)
            .nameAttributeKey(userNameAttributeName)
            .build();
    }

    private static OAuth2Attributes ofGoogle(String userNameAttributeName, Map<String, Object> attributes) {
        return OAuth2Attributes.builder()
            .oauthId((String) attributes.get(userNameAttributeName))
            .nickname((String) attributes.get("name"))
            .email((String) attributes.get("email"))
            .picture((String) attributes.get("picture"))
            .provider(Provider.GOOGLE)
            .attributes(attributes)
            .nameAttributeKey(userNameAttributeName)
            .build();
    }

    private static OAuth2Attributes ofGithub(String userNameAttributeName, Map<String, Object> attributes) {
        String nickname = ObjectUtils.isEmpty(attributes.get("name")) ? "login" : "name";
        return OAuth2Attributes.builder()
            .oauthId(attributes.get(userNameAttributeName).toString())
            .nickname((String) attributes.get(nickname))
            .email((String) attributes.get("email"))
            .picture((String) attributes.get("avatar_url"))
            .provider(Provider.GITHUB)
            .attributes(attributes)
            .nameAttributeKey(userNameAttributeName)
            .build();
    }

}
public static of 메서드를 이용해서 들어오는 provider마다 다른 메서드들이 동작하도록 하고 있다
참고로 아래의 코드를 이용하면 어떤 데이터든 스프링 서버 로그에서 JSON 형태로 볼 수 있다
new ObjectMapper().writerWithDefaultPrettyPrinter().writeValueAsString(보고싶은 객체))
추가로 JPA를 이용하는 경우 toEntity 메서드를 통해서 Member나 User 엔티티를 만드는 static method를 만들 수도 있다
이번에는 우리 OAuth2 의 핵심인 CustomOAuth2AuthService를 만들자
package com.boki.socialauth.oauth2.service;

import com.boki.socialauth.oauth2.OAuth2Attributes;
import java.util.Collections;
import lombok.RequiredArgsConstructor;
import lombok.SneakyThrows;
import lombok.extern.slf4j.Slf4j;
import org.springframework.security.core.authority.SimpleGrantedAuthority;
import org.springframework.security.oauth2.client.userinfo.DefaultOAuth2UserService;
import org.springframework.security.oauth2.client.userinfo.OAuth2UserRequest;
import org.springframework.security.oauth2.client.userinfo.OAuth2UserService;
import org.springframework.security.oauth2.core.OAuth2AuthenticationException;
import org.springframework.security.oauth2.core.user.DefaultOAuth2User;
import org.springframework.security.oauth2.core.user.OAuth2User;
import org.springframework.stereotype.Service;

@Slf4j
@RequiredArgsConstructor
@Service
public class CustomOAuth2AuthService implements OAuth2UserService<OAuth2UserRequest, OAuth2User> {

    @SneakyThrows
    @Override
    public OAuth2User loadUser(OAuth2UserRequest request) throws OAuth2AuthenticationException {
        log.info("CustomOAuth2AuthService");
        OAuth2UserService delegate = new DefaultOAuth2UserService();
        OAuth2User oAuth2User = delegate.loadUser(request);
        String registrationId = request.getClientRegistration().getRegistrationId();
        String userNameAttributeName = request.getClientRegistration().getProviderDetails().getUserInfoEndpoint().getUserNameAttributeName();
        OAuth2Attributes attributes = OAuth2Attributes.of(registrationId, userNameAttributeName, oAuth2User.getAttributes());
        return new DefaultOAuth2User(Collections.singleton(new SimpleGrantedAuthority("ROLE_USER")), attributes.getAttributes(), attributes.getNameAttributeKey());
    }
}
코드 분석을 하면 디폴트 서비스에게 요청된 OAuth2UserRequest를 위임해서 OAuth2User를 얻어온다
redistrationId(등록 ID)와 userNameAttributeName(PK)를 얻어오고 위에서 만든 OAuth2Attributes.of를 통해서 각각에 맞는 third party 앱에서 데이터를 뽑아서 Oauth2Attributes로 만든다.
그리고 권한을 ROLE_USER로 설정해서 성공 or 실패 핸들러로 넘기게 된다
https://code-boki.tistory.com/42?category=934141
여기서도 궁금하면 위에 ObjectMapper로 데이터를 찍어보자
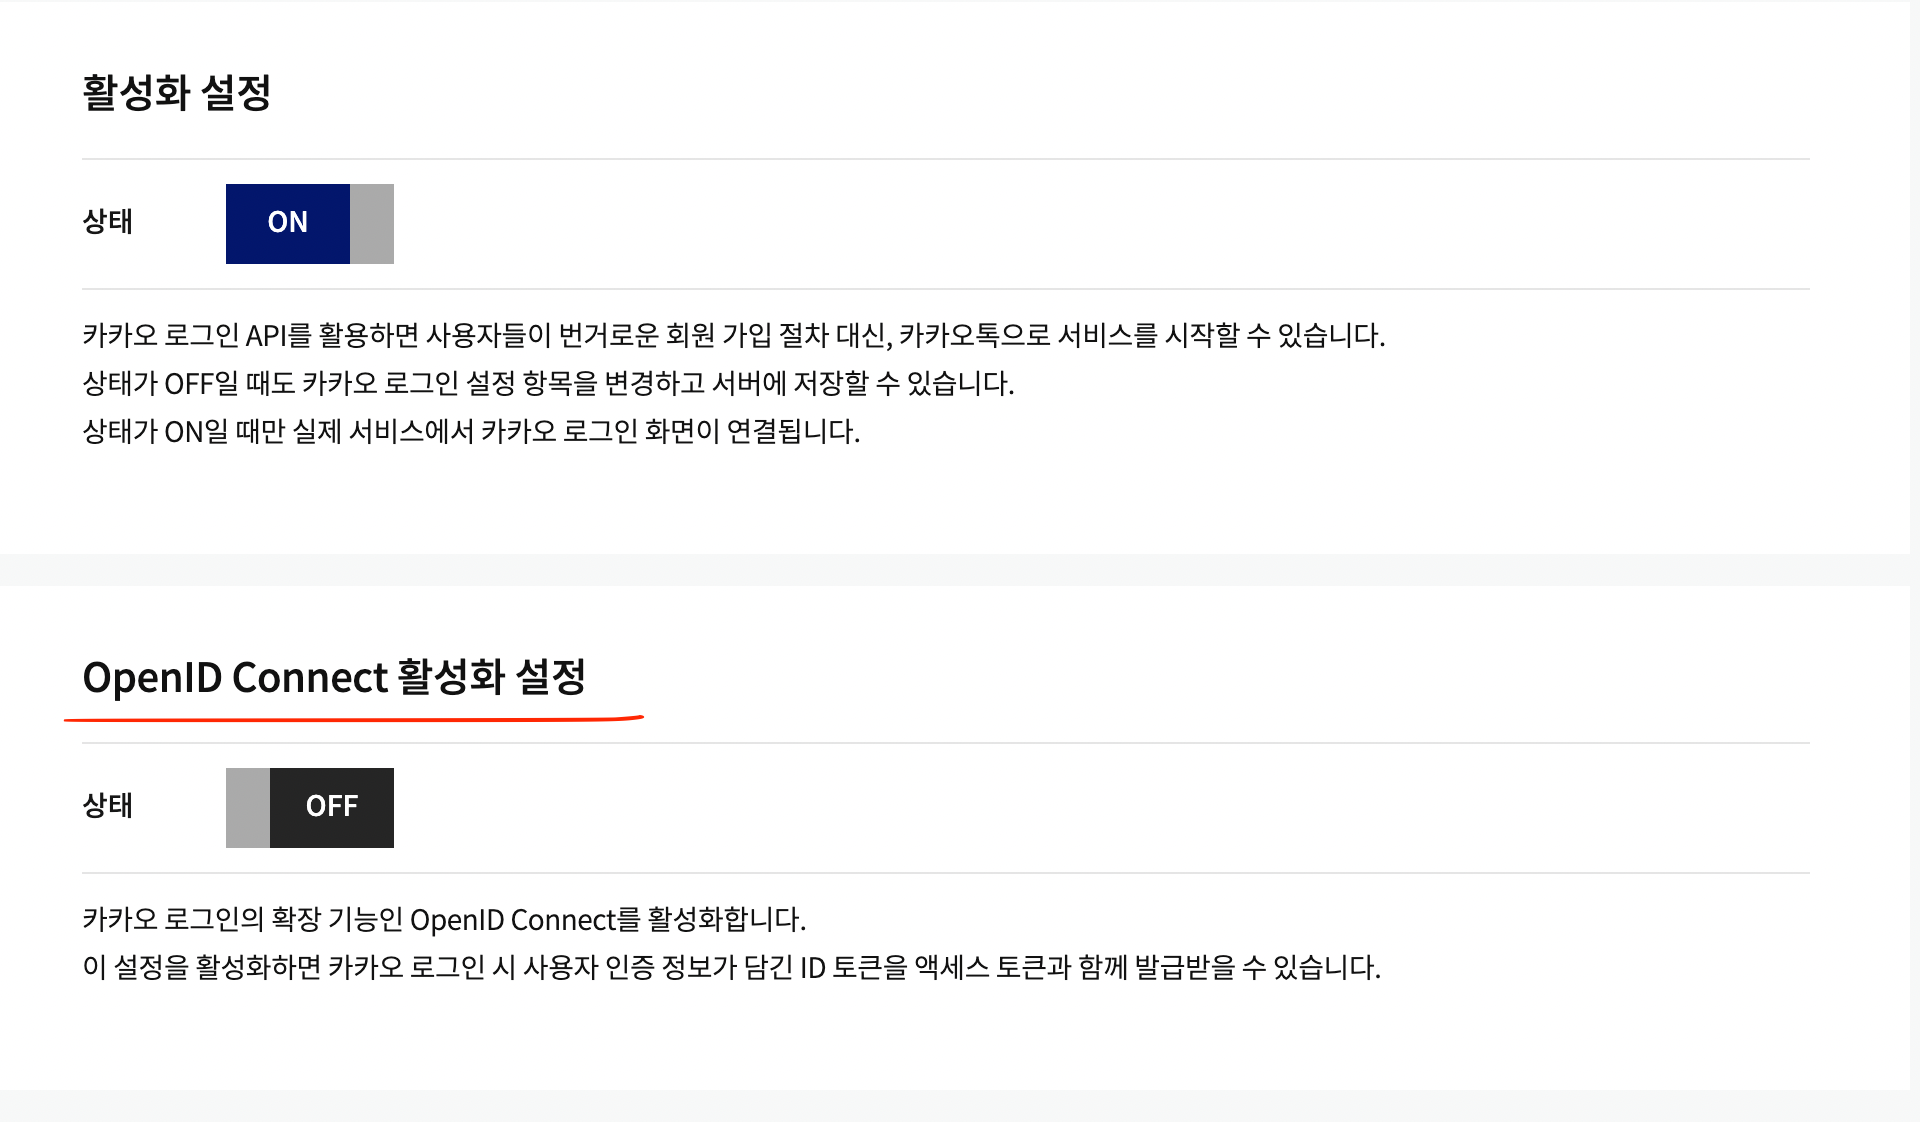
이번에는 OpenID Connect Service를 만들어보자
구글 같은 경우 scope를 지정해주지 않으면 CustomOAuth2Service대신 여기 OidcService를 타게 된다
package com.boki.socialauth.oauth2.service;

import com.boki.socialauth.oauth2.OAuth2Attributes;
import lombok.RequiredArgsConstructor;
import lombok.SneakyThrows;
import lombok.extern.slf4j.Slf4j;
import org.springframework.security.oauth2.client.oidc.userinfo.OidcUserRequest;
import org.springframework.security.oauth2.client.oidc.userinfo.OidcUserService;
import org.springframework.security.oauth2.client.userinfo.DefaultOAuth2UserService;
import org.springframework.security.oauth2.client.userinfo.OAuth2UserService;
import org.springframework.security.oauth2.core.OAuth2AuthenticationException;
import org.springframework.security.oauth2.core.oidc.user.OidcUser;
import org.springframework.security.oauth2.core.user.OAuth2User;
import org.springframework.stereotype.Service;

@Slf4j
@RequiredArgsConstructor
@Service
public class CustomOidcUserService extends OidcUserService {

    @SneakyThrows
    @Override
    public OidcUser loadUser(OidcUserRequest request) throws OAuth2AuthenticationException {
        log.info("CustomOidcUserService");
        OAuth2UserService delegate = new DefaultOAuth2UserService();
        OAuth2User oAuth2User = delegate.loadUser(request);
        String registrationId = request.getClientRegistration().getRegistrationId();
        String userNameAttributeName = request.getClientRegistration().getProviderDetails().getUserInfoEndpoint().getUserNameAttributeName();
        OAuth2Attributes attributes = OAuth2Attributes.of(registrationId, userNameAttributeName, oAuth2User.getAttributes());
        return (OidcUser) new DefaultOAuth2User(Collections.singleton(new SimpleGrantedAuthority("ROLE_USER")), attributes.getAttributes(), attributes.getNameAttributeKey());
    }
}
OIdc는 OpenIDConnect라고 하는데, 내부적으로 인증로직이 돌고, 토큰을 바로 반환해주고 이 토큰으로 로그인을 처리하고 싶을때 사용한다
음..... 예를들면 로그인은 쿠키나 세션혹은, 다른 방법인데 소셜만 유독 간단하게 처리하고싶다하면 각 서비스마다의 OIDC 서비스를 찾아보면 좋다. 잘 찾아보면 카카오도 지원하더라
이제 성공/실패 핸들러를 작성하자
package com.boki.socialauth.oauth2.handler;

import com.boki.socialauth.oauth2.Provider;
import java.io.IOException;
import javax.servlet.ServletException;
import javax.servlet.http.HttpServletRequest;
import javax.servlet.http.HttpServletResponse;
import lombok.RequiredArgsConstructor;
import lombok.extern.slf4j.Slf4j;
import org.springframework.security.core.Authentication;
import org.springframework.security.web.authentication.AuthenticationSuccessHandler;
import org.springframework.stereotype.Component;
import org.springframework.web.util.UriComponentsBuilder;

@Slf4j
@RequiredArgsConstructor
@Component
public class OAuth2AuthenticationSuccessHandler implements AuthenticationSuccessHandler {

    @Override
    public void onAuthenticationSuccess(HttpServletRequest httpServletRequest, HttpServletResponse httpServletResponse, Authentication authentication) throws IOException, ServletException {
        log.info("성공!");
        String[] path = httpServletRequest.getRequestURI().split("/");
        Provider provider = Provider.valueOf(path[path.length - 1].toUpperCase());
        String oauthId = authentication.getName();

        String uri = UriComponentsBuilder.fromUriString( "http://localhost:80/social")
                .queryParam("provider", provider)
                .queryParam("oauthId", oauthId)
                .build().toUriString();
        httpServletResponse.sendRedirect(uri);
    }
}
성공하면, /social경로로 parameter에(queryString에) provider , oauthId를 보낸다
보통 여기에서 JwtUtil / JwtTokenProvider 등을 활용해서 토큰으로 만들고 ?token = JWT-TOKEN
이런식으로 붙이는 식이다. 나는 심플하게 값이 잘 넘어오는지만 보기 위해 이렇게 작성했다
아! 그리고 회원가입 로직은 성공핸들러 또는 loadUser가 있는 각 서비스에서 구현될 수 있다 (@Transaction)
나는 성공핸들러에서 저장하는게 맞다고 생각한다..!!
package com.boki.socialauth.oauth2.handler;

import java.io.IOException;
import javax.servlet.ServletException;
import javax.servlet.http.HttpServletRequest;
import javax.servlet.http.HttpServletResponse;
import lombok.extern.slf4j.Slf4j;
import org.springframework.security.core.AuthenticationException;
import org.springframework.security.web.DefaultRedirectStrategy;
import org.springframework.security.web.RedirectStrategy;
import org.springframework.security.web.authentication.AuthenticationFailureHandler;
import org.springframework.stereotype.Component;

@Slf4j
@Component
public class OAuth2AuthenticationFailureHandler implements AuthenticationFailureHandler {

    private final RedirectStrategy redirectStrategy = new DefaultRedirectStrategy();

    @Override
    public void onAuthenticationFailure(HttpServletRequest httpServletRequest, HttpServletResponse httpServletResponse, AuthenticationException e) throws IOException, ServletException {
        log.info("실패!");
        redirectStrategy.sendRedirect(httpServletRequest,httpServletResponse,"/login");
    }
}
실패가 뜬다면 다시 /login페이지로 돌아가도록 설정했다
마지막으로 config 패키지에 SecurityConfig를 추가한다
package com.boki.socialauth.config;

import com.boki.socialauth.oauth2.handler.OAuth2AuthenticationFailureHandler;
import com.boki.socialauth.oauth2.handler.OAuth2AuthenticationSuccessHandler;
import com.boki.socialauth.oauth2.service.CustomOAuth2AuthService;
import com.boki.socialauth.oauth2.service.CustomOidcUserService;
import lombok.RequiredArgsConstructor;
import org.springframework.context.annotation.Bean;
import org.springframework.security.config.annotation.web.builders.HttpSecurity;
import org.springframework.security.config.annotation.web.configuration.EnableWebSecurity;
import org.springframework.security.config.annotation.web.configuration.WebSecurityConfigurerAdapter;
import org.springframework.security.config.http.SessionCreationPolicy;
import org.springframework.security.crypto.bcrypt.BCryptPasswordEncoder;
import org.springframework.security.crypto.password.PasswordEncoder;

@RequiredArgsConstructor
@EnableWebSecurity
public class SecurityConfig extends WebSecurityConfigurerAdapter {

    private final CustomOAuth2AuthService customOAuth2AuthService;

    private final CustomOidcUserService customOidcUserService;

    private final OAuth2AuthenticationSuccessHandler oAuth2AuthenticationSuccessHandler;

    private final OAuth2AuthenticationFailureHandler oAuth2AuthenticationFailureHandler;

    @Bean
    PasswordEncoder passwordEncoder() {
        return new BCryptPasswordEncoder();
    }

    @Override
    protected void configure(HttpSecurity http) throws Exception {
        http
            .httpBasic().disable()
            .formLogin().disable()
            .csrf().disable()
            .cors()
            .and()
            .sessionManagement()
            .sessionCreationPolicy(SessionCreationPolicy.STATELESS)
            .and()
            .oauth2Login()
            .userInfoEndpoint()
            .oidcUserService(customOidcUserService)
            .userService(customOAuth2AuthService)
            .and()
            .successHandler(oAuth2AuthenticationSuccessHandler)
            .failureHandler(oAuth2AuthenticationFailureHandler);
    }
}
시큐리티 공부시간이 아니므로.. oauth2Login의 userInfoEndpoint는 openId일때는 customOidcUserService가, 그 이외의 정확한 scope가 있다면 customeOAuth2AuthService를 이용한다고 했다
loadUser가 성공하면 SuccessHandler로, 실패하면 FailureHandler로 간다
자 이제 스프링 부트를 구동시켜보자
그리고 자기의 로컬호스트/login으로 들어가보자
나같은 경우는
http://localhost/login 이다(80은 well-known http포트이므로)
그럼 우리가 만든 페이지가 아닌 이쁜 페이지가 나온다

자 이제 각각 하나씩 눌러보면 된다

깃허브를 누르면 아까 loadUser내의 of 함수에서 userNameAttributeName(PK)는 id이고, Map Attributes의 값들을 볼 수 있다
난 이미 한번 로그인을 했었기 때문에
http://localhost/social?provider=GITHUB&oauthId=xxxxxxxx
주소로 들어와서
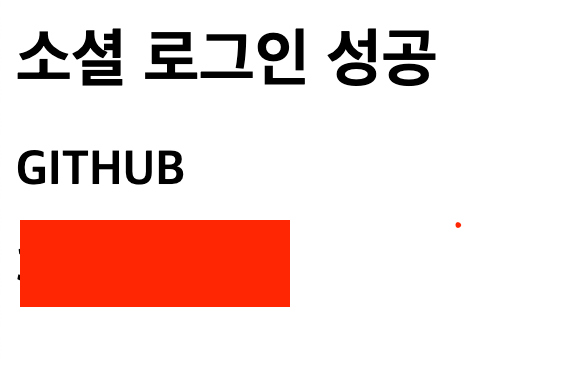
소셜 로그인 성공한 것을 볼 수 있다. 내친김에 Naver, Kakao, Facebook, Google도 다 해보자
다 잘 되는 것을 확인했다. 참고로 네이버는 네아로(네이버 아이디로 로그인)일때 자기 자신 혹은 테스터로 등록된 유저만 로그인 할 수 있다
또는 단체로그인 아이디는 로그인이 안되니까 참고하길 바란다
위의 로직에서 보안을 위해 Redis에 데이터를 저장할 수도 있고, RequestParams들에 UUID를 넣을 수도 있고 그건 개발자 선택인 것 같다. 아무래도 리다이렉트 하면서 정보를 넘겨줄수 있는 것은 parameters 뿐이 없으니 말이다
유저가 가입되는 시점은 loadUser 혹은 Succeess로 하면 될 것 같다..!
만약에 로그인이 안된다면 키 값들, redirectURL이 잘 설정되어 있나 보면 될것이다!!
https://github.com/lsb530/socialAuth
GitHub - lsb530/socialAuth
Contribute to lsb530/socialAuth development by creating an account on GitHub.
github.com
에서 다운받을 수 있다
어차피 다운 안받아도 금방 만들 수 있을 거같은데..
그럼 고생하셨습니다!!!
+ 최신 스프링 버전으로 시작하면 WebSecurityConfigurerAdapter를 상속받지 않는 방식으로 변경되었다
https://www.codejava.net/frameworks/spring-boot/fix-websecurityconfigureradapter-deprecated
Spring Security - How to Fix WebSecurityConfigurerAdapter Deprecated
DetailsWritten by Nam Ha Minh Last Updated on 21 July 2022 | Print Email In this short article, I’d like to share how to get rid of the warning saying that “The type WebSecurityConfigurerAdapter is deprecated” in Spring-based application w
www.codejava.net
이유를 보아하니

스프링 프레임웤 개발자들은 유저들이 컴포넌트 기반의 Security Configuration을 지향하도록 격려한다고 한다
아마도 재정의(override) 방식을 쓰면 Adapter에 종속이 되어버리니, 좀 더 확장성 있게 작성하라고 권고하는 것 같다
그리고 직접 SecurityFilterChain을 등록하라고 한다(Security는 Filter들의 모임이다 => FilterChain)
추가로 자원 경로에 대한 처리는 Customizer에서 할 수 있다
그래서 변경된 아래 코드로 작성하면 된다
package com.boki.socialauth.config;

import com.boki.socialauth.oauth2.handler.OAuth2AuthenticationFailureHandler;
import com.boki.socialauth.oauth2.handler.OAuth2AuthenticationSuccessHandler;
import com.boki.socialauth.oauth2.service.CustomOAuth2AuthService;
import com.boki.socialauth.oauth2.service.CustomOidcUserService;
import lombok.RequiredArgsConstructor;
import org.springframework.context.annotation.Bean;
import org.springframework.context.annotation.Configuration;
import org.springframework.security.config.annotation.web.builders.HttpSecurity;
import org.springframework.security.config.annotation.web.configuration.EnableWebSecurity;
import org.springframework.security.config.annotation.web.configuration.WebSecurityCustomizer;
import org.springframework.security.config.http.SessionCreationPolicy;
import org.springframework.security.crypto.bcrypt.BCryptPasswordEncoder;
import org.springframework.security.crypto.password.PasswordEncoder;
import org.springframework.security.web.SecurityFilterChain;

@RequiredArgsConstructor
@Configuration
public class SecurityConfig {

    private final CustomOAuth2AuthService customOAuth2AuthService;

    private final CustomOidcUserService customOidcUserService;

    private final OAuth2AuthenticationSuccessHandler oAuth2AuthenticationSuccessHandler;

    private final OAuth2AuthenticationFailureHandler oAuth2AuthenticationFailureHandler;

    @Bean
    PasswordEncoder passwordEncoder() {
        return new BCryptPasswordEncoder();
    }

    @Bean
    public SecurityFilterChain filterChain(HttpSecurity http) throws Exception {
        http
            .httpBasic().disable()
            .formLogin().disable()
            .csrf().disable()
            .cors()
            .and()
            .sessionManagement()
            .sessionCreationPolicy(SessionCreationPolicy.STATELESS)
            .and()
            .oauth2Login()
            .userInfoEndpoint()
            .oidcUserService(customOidcUserService)
            .userService(customOAuth2AuthService)
            .and()
            .successHandler(oAuth2AuthenticationSuccessHandler)
            .failureHandler(oAuth2AuthenticationFailureHandler);
        return http.build();
    }

    @Bean
    public WebSecurityCustomizer webSecurityCustomizer() {
        return (web -> web.ignoring().antMatchers("/images/**", "/js/**", "/webjars/**"));
    }
}
'Backend > Java - Spring' 카테고리의 다른 글
| DTO 돌려막기 멈춰!(feat. jackson annotation) (0) | 2022.05.30 |
|---|---|
| 스프링 시큐리티 + 소셜로그인 구현(1) - 앱 등록하고 키값 얻기 (0) | 2022.04.18 |
| 스프링 시큐리티 + 소셜로그인 구현(0) - 기본 정보 알기 (0) | 2022.04.14 |


댓글